
Options for Taking Screenshots in Ubuntu
How to take screenshots in Ubuntu, and include the pointer if desired.

Edited: 2017-04-10 21:44
Recently I had to take some screenshots in Ubuntu, and I was baffled to find that the pointer was missing from the screenshots. Why would anyone even want to hide the pointer? It makes no sense. When I take a screenshot, I expect it to catch exactly what is on the screen, and nothing less.
The easiest way to include the pointer, is to open the screenshot app and check the Include pointer checkbox. You can also set a delay, giving you time to minimize the screenshot app.
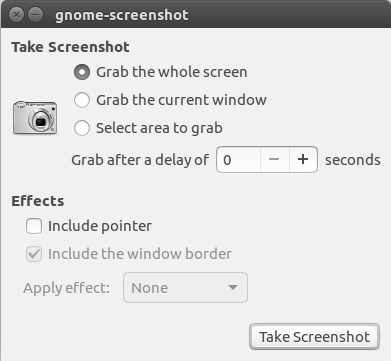
Checking this box will only affect screenshots taken while the app is open. So it is more like a hack then a permanent solution. Instead you should try setting a custom shortcut, using the command to include the pointer.
Setting custom shortcut for taking screenshots
The screenshot app in Ubuntu is gnome-screenshot. By default, it will not capture the pointer, and checking the "Include pointer" option is not saved on exit. But, you can create a custom shortcut to change the standard behavior.
The below are the commands listed by typing gnome-screenshot -h in a terminal.
| -c | Send the grab directly to the clipboard. |
| -w | Grab a window instead of the entire screen. |
| -a | Takes a screenshot of an area (allows you to select the area). |
| -p | Include the pointer. |
| -d | Delay in seconds. |
| -b | Include the window border in the screenshot. |
| -B | Remove the window border from the screenshot. |
| --file=filename | Save the screenshot directly to filename. |
The shortcut command can look like this:
gnome-screenshot -p -w
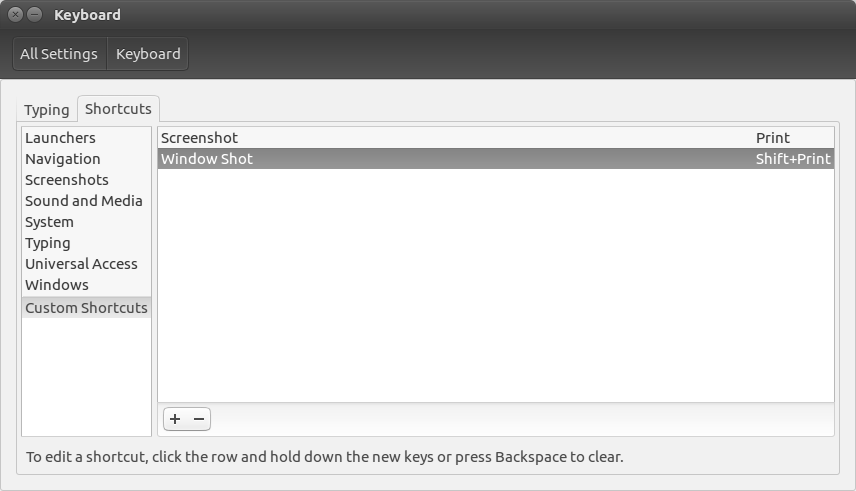
Simply click on the bindings for taking a screenshot, and hit backspace to disable them. Then bind your new custom shortcuts.
Shutter appears to be bugged
There is another app called Shutter, but when I tried this, I was unable to get it to work. Nothing happened when I tried to take a screenshot of a window using shutter -a in a custom shortcut. Taking a screenshot of the entire screen (shutter -f) worked, and after changing the preferences it also included the pointer as i wanted it to.
I ended up going back to using gnome-screenshot, which, as it turns out, also makes it possible to include the pointer in your screenshots. You just have to unbind the default shortcut for print screen, and then bind a new one using the -p option to enable the pointer.
I only mention this because other people has recommended shutter. I am not sure what the extra features offered by the shutter app are. But, I just need to take screenshots and edit them in Gimp, so I do not really care.
Tell us what you think: