
Making Animated Hand-coded SVG Files
Beginners tutorial on how to hand-code, and animate .svg files with CSS.

By. Jacob
Edited: 2019-10-14 13:10
Animating SVGs can be done using simple CSS, the same way you would animate HTML elements. I know how to draw using Illustrator and Inkscape, although I am not very good at it. But, I love coding SVGs by hand!
When coding SVGs by hand, there are a few ways to go about animating them. You can either choose to embed the CSS directly in the SVG file itself, or you can link to it from a HTML web page. Embedded styles in a HTML page will also work, but usually you would link to an external StyleSheet, but this depends on what your goals are.
The SVG code itself should be embedded in the HTML for this to work. If you are creating a .svg file, you should instead embed the CSS within the file. This is done using a <style> element within the <svg> element, at the top, before other elements in the svg.
You can start coding your SVG using <rect> and <circle> to create simple shapes, such as rectangles and circles.
These elements are so-called self-closing elements, and since we are coding XML, the closing slash is mandatory. This is unlike the infamous <br> element or <img> in HTML, where the closing slash may be omitted. In fact, I never use closing slashes when coding HTML, so I was initially unsure if they were needed for embedded SVGs. A quick test, and I found out the SVGs would not be displayed properly if omitted.
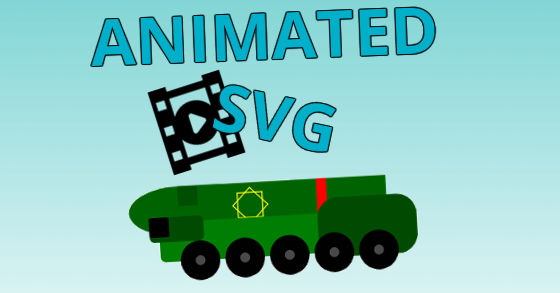
Below is a .svg I handcoded and animated using CSS. It took me a couple hours without prior knowledge of coding SVGs by hand.

The basics about SVG
Before I show the code for the above SVG, I will just explain some basics to help you optimize your code.
As you may already know, each SVG element has presentational attributes to control the visual appearance. Some of these attributes can also be controlled with CSS, but support is still por for Geometric attributes. For example, both fill and transform (SVG 1.1) can be controlled with CSS, but the geometric attributes, such as x, y, and r (SVG 2) only seem to work in Chrome. The purpose of replacing presentational attributes entirely, is to produce clean, minimized, SVG code to get as small a file size as possible. Often, WYSIWYG tools will add a lot of redundant code, which just increases the file size. This is not a problem when coding by hand.
Note. x and y controls the position of elements, while fill controls what we typically know as the "background-color". r, the radius of circles.
Just as with basic HTML and CSS, we can use classes and IDs in SVGs. This makes it easy to group repetitive styles in classes, and thereby minimize the amount of code required.
While optimizing code may seem daunting to many beginners, it is actually not hard at all, and does not take much time once you have reached a certain level of skill. The point of doing it, is to lower the file size of the finished .svg files, which in turn speeds up loading of web pages.
If you wish to animate the position of elements, the transform:translate(x,y); may be used instead of x and y. As you can see from my SVG, this can be combined with rotate(10deg) as well.
SVG example code
This code is for the SVG included earlier. Note that you might not be able to edit this when opening it in Illustrator or Inkscape, as these programs do not yet seem to support embedded CSS styles properly. You can however still edit it by hand, and use it as an example of how to create your own hand-coded svgs.
I used nothing but rectangles and circles to create this drawing. The g element is used for grouping, and for easier styling with CSS. Enjoy!
<svg viewBox="0 0 400 300" version="1.1"
     xmlns="http://www.w3.org/2000/svg" standalone="yes">
    <style type="text/css">
    #rocket {
        transform-origin: 60% 100%;
        animation: battleFormationRepeat 10s 0s infinite;
    }
    #rocketLifter rect {
        transform-origin: 100% 50%;
        animation: moveUpDown 10s 0s infinite;
        fill:#007b03;
    }
    #rocketTruckBody #mainBody {
        fill:#007e03;
    }
    #rocketTruckBody #mainAss {
        fill: #004b02;
    }
    #rocketTruckBody #mainControl {
        fill: #004b02;
    }
    .window {
        fill: #000;
    }
    #rocket rect {
        fill: #006302;
    }
    #rocket .panel {
        fill:#004e02;
    }
    #rocket .redStripe {
        fill:#ff0000;
    }
    #star rect {
        transform:rotate(0deg) translate(150px,10px);
        stroke-width: 1;
        stroke: #ffff00;
        fill: none;
    }
    #star rect + rect {
        transform:rotate(45deg) translate(200px,-145px);
    }
    .weel circle {
        fill: #010101;
    }
    .weel circle+circle {
        fill: #494949;
    }
    @keyframes battleFormationRepeat {
        0% {
            transform: rotate(0deg);
        }
        50% {
            transform: rotate(13deg);
        }
        100% {
            transform: rotate(0deg);
        }
    }
    @keyframes moveUpDown {
        0% {
            transform:rotate(0deg);
        }
        50% {
            transform:rotate(10deg);
        }
        100% {
            transform:rotate(0deg);
        }
    }
    </style>
    <g id="rocketLifter">
        <rect width="20" height="70" x="100" y="135"/>
    </g>
    <g id="rocket">
        <rect width="100" height="50" x="200" y="115" />
        <rect width="100" height="50" x="110" y="115"/>
        <rect width="140" height="50" x="40" rx="50" y="115"/>
        <rect width="10" height="50" class="redStripe" x="230" y="115"/>
        <rect width="20" height="20" class="panel" x="90" y="115"/>
        <g id="star">
            <rect width="25" height="25" y="115"/>
            <rect width="25" height="25" y="115"/>
        </g>
    </g>
    <g id="rocketTruckBody">
        <rect width="190" height="40" x="70" y="150" rx="5" id="mainBody"/>
        <rect width="100" height="60" x="230" y="135" rx="20" id="mainAss"/>
        <rect width="55" height="25" x="60" y="145" rx="5" id="mainControl"/>
        <rect width="20" height="20" x="60" y="145" rx="2" class="window"/>
    </g>
    <g class="weel">
        <circle cx="290" cy="190" r="20"/>
        <circle cx="290" cy="190" r="5"/>
    </g>
    <g class="weel">
        <circle cx="110" cy="190" r="20"/>
        <circle cx="110" cy="190" r="5"/>
    </g>
    <g class="weel">
        <circle cx="155" cy="190" r="20"/>
        <circle cx="155" cy="190" r="5"/>
    </g>
    <g class="weel">
        <circle cx="200" cy="190" r="20"/>
        <circle cx="200" cy="190" r="5"/>
    </g>
    <g class="weel">
        <circle cx="245" cy="190" r="20"/>
        <circle cx="245" cy="190" r="5"/>
    </g>
</svg>
Tell us what you think: