
Configuring VirtualBox with Host-only and NAT Adapter
Tutorial showing how to configure a VirtualBox Guest VM with HOST-only and NAT adapter, while using the WWW folder from the HOST OS.

By. Jacob
Edited: 2021-11-25 01:35
When there is a new version of Ubuntu and you update, usually everything will go smoothly. But, after upgrading to kUbuntu 21.10 I ended up with various minor dependency issues; one package, x, would depend on a older version of another package, y.
See also: The Safety of Do-Release-Upgrade in Ubuntu
I was stuck in dependency hell for several days before solving the most paralyzing of problems — my local web development environment had stopped working. Specifically PHP8.0-gd could not be installed, because it was dependent on an outdated package.
Note. It appears that this problem has since been fixed in the official repositories.
Even though the problem appears to have been fixed, I have now realized that I can not safely have my development environment coupled with my personal system — to avoid future incidents like this, I would have to install my test-servers in a containerized environment, like VirtualBox — surprisingly this was not very hard to do.
Doing this also allows me to run a different OS or Linux distribution for my main OS; for server stuff you might prefer Ubuntu, but for your main OS you might prefer to use Arch Linux, KDE Neon or even Windows.
My VirtualBox Environment
I carefully created a setup that would allow me to still do my coding from the host system, while the servers and all the code was running in the containerized guest. Doing this allowed me to run the latest version of my operating system, while my development environment was running the LTS version of Ubuntu Server.
1. Since I had no use for a GUI in the GUEST system, I decided to install Ubuntu Server. I am not going through the installation process in this article, so I assume you already know how to setup and install Ubuntu.
2. After installing Ubuntu, you should install SSH, and then run VirtualBox in headless mode.
Optionally. After installing SSH in the GUEST, you may need to change the timeout settings: Prevent Constant Timeouts with SSH and SFTP
3. To then start your Virtual Box, simply run the following in a terminal:
jacob@desktop:~$ vboxmanage startvm [name of VM] --type headless
Note. the name is case sensitive!
4. You can then connect to the Virtual Box through SSH:
jacob@desktop:~$ ssh [GUEST_USER]@192.168.56.101
Configuring the Network adapters
The most difficult part of this setup is the Network configuration. You will need to configure the box with two adapters in order to get a static IP address, while also being able to access the internet from the box.
You need this so that you can configure your /etc/host file on the host OS; this file should contain local domain names that you want your guest VM to serve.
Note. Without a static IP for your VM, you risk having to update your host file occasionally, which is not very practical.
Each local domain should point to the VM IP address of the Host-only adapter. In my case that is 192.168.56.101.
Of course, if you are just running this on your own home network, you could just reserve an IP address in your router for the VM, but that will not work when you are visiting a friend, at work, or at the library.
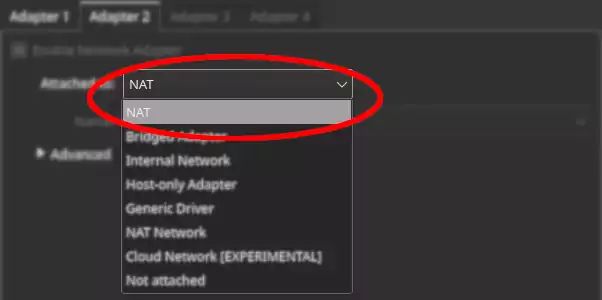
To make your guest VM work regardless of the LAN configuration, you will need to attach a host only adapter as your first adapter, and then a NAT adapter as your second adapter for the guest.
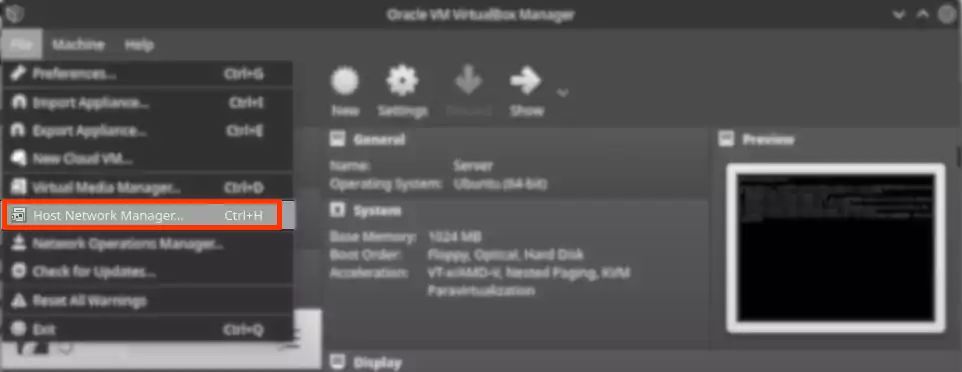
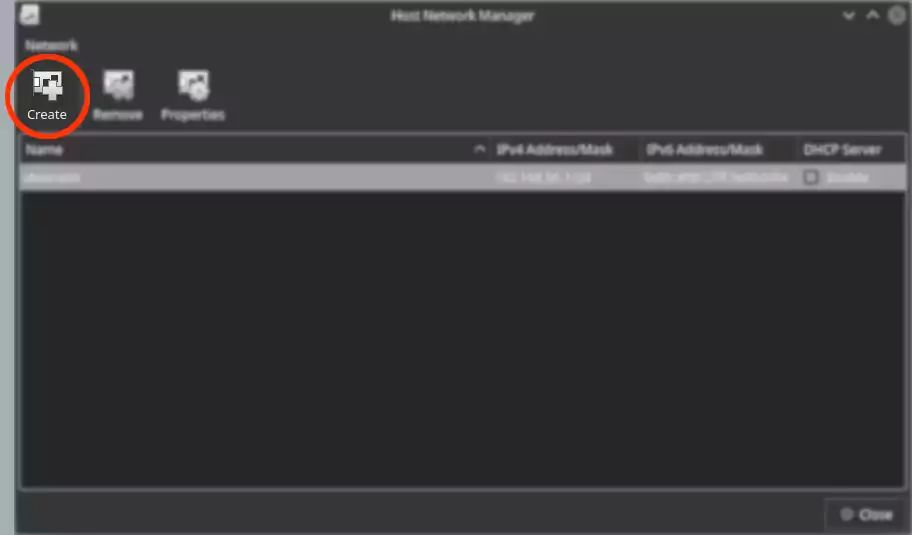
1. Start by creating a new host only adapter that you can assign to your individual boxes. This is done from the main VirtualBox Window, as shown on the screenshot:
Then create a new host adapter:
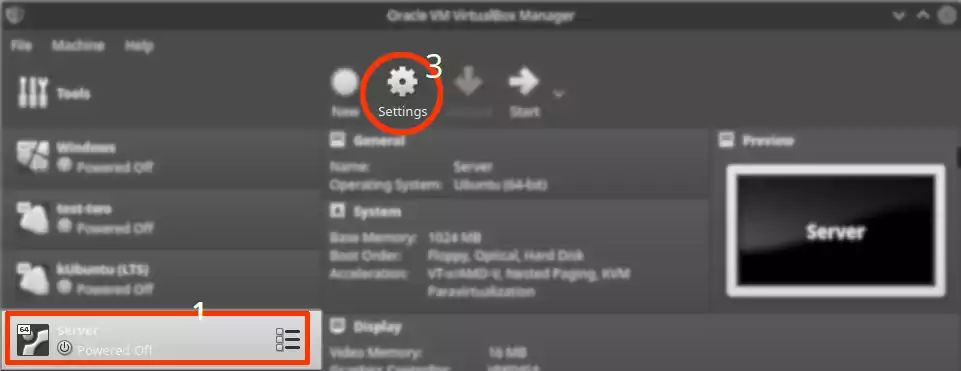
2. Assign the newly created adapter to your guest VM, as shown in the following screenshots:
Configure Network Adapters in the Guest VM
1. In order to have internet access from your guest VM, you also need to configure the Adapters in /etc/netplanner/00-installer-config.yaml.
Note. Ubuntu 18.04 LTS switched to Netplan for configuring network interfaces with .yaml files.
Here is an exact copy of my /etc/netplanner/00-installer-config.yaml file:
network:
  ethernets:
    enp0s3:
      dhcp4: no
      addresses: [192.168.56.101/24]
    enp0s8:
      dhcp4: true
      nameservers:
        addresses: [8.8.4.4, 8.8.8.8]
  version: 2
Note. dhcp4 (IPV4) is disabled for the host adapter, and the LAN IP address of the interface is instead manually assigned.
Note. Things might break if you mess up the indentation — it is very delicate.
2. Apply the configuration and reboot when done.
jacob@dev:~$ sudo netplan apply && sudo reboot now
The NAT interface is called enp0s8 in my case; you may also need to add this to your configuration, because you might need to assign DNS servers manually.
(Optionally). If this does not work, possibly due to name- and IP differences, you can manually check for the right values by inspecting Adapters on your system; one way is to use the ifconfig command:
jacob@dev:~$ ifconfig
enp0s3: flags=4163<UP,BROADCAST,RUNNING,MULTICAST>  mtu 1500
        inet 192.168.56.101  netmask 255.255.255.0  broadcast 192.168.56.255
        inet6 fe82::a00:23ft:fee1:a280  prefixlen 64  scopeid 0x20<link>
        ether 08:00:72:e2:a5:70  txqueuelen 1000  (Ethernet)
        RX packets 1182  bytes 86481 (86.4 KB)
        RX errors 0  dropped 0  overruns 0  frame 0
        TX packets 1098  bytes 185195 (185.1 KB)
        TX errors 0  dropped 0 overruns 0  carrier 0  collisions 0

enp0s8: flags=4163<UP,BROADCAST,RUNNING,MULTICAST>  mtu 1500
        inet 10.0.3.15  netmask 255.255.255.0  broadcast 10.0.3.255
        inet6 ft80::b00:72ff:fe31:tb2  prefixlen 64  scopeid 0x20<link>
        ether 08:00:72:31:0a:b2  txqueuelen 1000  (Ethernet)
        RX packets 16369  bytes 24228149 (24.2 MB)
        RX errors 0  dropped 0  overruns 0  frame 0
        TX packets 2082  bytes 134556 (134.5 KB)
        TX errors 0  dropped 0 overruns 0  carrier 0  collisions 0
Sharing the HOSTs www folder with the GUEST
A useful trick that will allow you to edit and test code from your host system while the code is running in the VM, is simply sharing your host's /var/www/ or /public/html/ directory with the VM, and then using the shared folder when configuring individual Apache VHOST files.
When you share a folder in Virtual Box from the host system, you will need to add both your own user and Apache's user to the vboxsf group — this will allow both yourself and Apache to access the files.
Note. In Ubuntu based systems, Apache's user is called www-data.
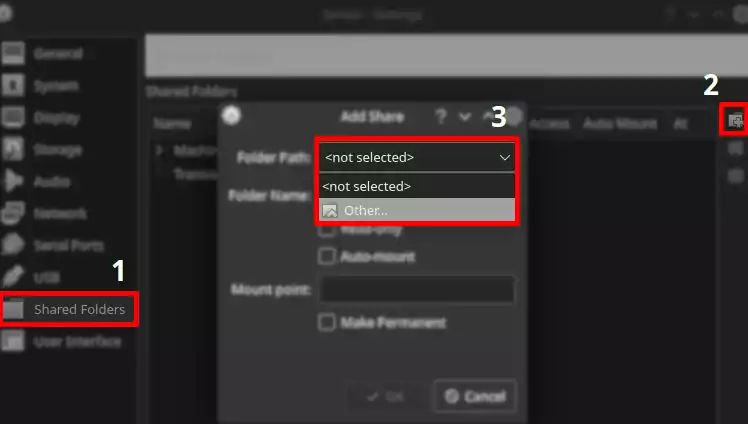
1. Sharing a folder from your host system is done from the VirtualBox configuration:
2. Add the required users to the vboxsf on the guest VM:
jacob@dev:~$ sudo adduser $USER vboxsf && sudo adduser www-data vboxsf
Configuring Apache's VHOST files
When configuring your Virtual Hosts with Apache, you simply use the shared folder, /media/sf_www/some-site-name/ as the DocumentRoot in your VirtualHost blocks.
Here is a basic example of a working VHOST configuration:
<VirtualHost 192.168.56.101:80>
    DocumentRoot "/media/sf_www/example/"
    ServerName example.local
    ErrorLog ${APACHE_LOG_DIR}/example-error.log
    CustomLog ${APACHE_LOG_DIR}/example-access.log common

  <Directory "/media/sf_www/example/">
    Options FollowSymLinks
    AllowOverride None

    AddDefaultCharset utf-8

    Require all granted
  </Directory>

 </VirtualHost>
The VHOST is configured to listen on the host interface, which is 192.168.56.101 in my case. Alternatively you could also use the wildcard * to listen on all attached interfaces.
Note. Do not worry if Apache fails to start — this commonly happens due to misconfigurations — to debug such problems, it is best to only start with a single host enabled.
How to enable and disable Apache v-hosts
Remember, to enable a v-host in Apache, you may use the a2ensite command; also, navigating to /etc/apache2/sites-available/ may make it easier:
jacob@dev:~$ cd /etc/apache2/sites-available/
jacob@dev:~$ sudo a2ensite example.conf
jacob@dev:~$ sudo service apache2 reload
To check which sites are already enabled:
jacob@dev:~$ ls /etc/apache2/sites-enabled/
And to disable a site:
jacob@dev:~$ sudo a2dissite example.conf
jacob@dev:~$ sudo service apache2 reload
Tell us what you think: